
The SharkRF Openspot is a compact and powerful device that allows you to connect to digital radio networks using your existing analog radio. Whether you’re a ham radio operator, a DMR enthusiast, or just someone who wants to explore the world of digital radio, the Openspot has got you covered. With its intuitive interface and wide range of features, it’s the perfect companion for both beginners and experienced users alike.
One of the standout features of the Openspot is its ability to connect to multiple digital radio networks simultaneously. This means that you can access DMR, D-Star, and Fusion networks all from one device, without the need for multiple radios or hotspots. With just a few clicks, you can switch between networks and explore the different modes and talkgroups available.
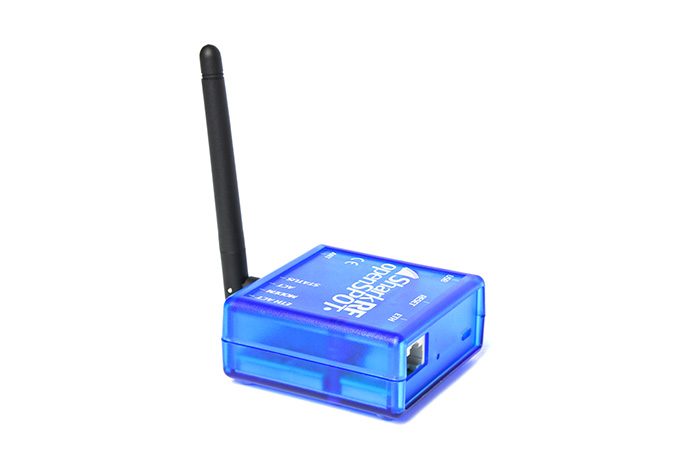
SharkRF Openspot: Getting Started with Openspot
Before you begin, make sure you have the necessary equipment. You will need a SharkRF Openspot device, a computer or smartphone, and an internet connection. Once you have everything ready, follow the steps below:
Step 1: Connect Openspot to Power
Start by connecting your Openspot device to a power source using the provided power adapter. Once connected, the device will power on and the LED indicator will light up.
Step 2: Connect Openspot to Network
Next, connect your Openspot device to your home network using an Ethernet cable. Plug one end of the cable into the Ethernet port on the back of the Openspot, and the other end into an available port on your router or modem.
Step 3: Access Openspot Configuration
Now that your Openspot is connected to power and the network, you can access the configuration interface. Open a web browser on your computer or smartphone and enter the IP address of your Openspot in the address bar. The default IP address is 192.168.1.1.
Step 4: Configure Openspot
Once you have accessed the configuration interface, you can begin configuring your Openspot. Follow the on-screen instructions to set up your desired settings, such as Wi-Fi network, DMR ID, and radio frequency. Make sure to save your changes before proceeding.
Step 5: Connect Openspot to Radio
After configuring Openspot, you will need to connect it to your radio. Use a suitable cable to connect the audio output of your radio to the audio input of the Openspot. Refer to the user manual of your radio for specific instructions on how to make the connection.
Step 6: Test Openspot
Once the physical connections are made, it’s time to test your Openspot. Turn on your radio and make sure it is set to the correct frequency and mode. You should now be able to transmit and receive signals using Openspot.
Congratulations! You have successfully completed the initial setup and configuration of your SharkRF Openspot. Now you can explore the advanced features and tips for using Openspot, which will be covered in the next section of this ultimate guide.
Getting Started with SharkRF Openspot
Setting up and configuring your SharkRF Openspot is a straightforward process that can be done in a few simple steps. Whether you are a beginner or an experienced user, this guide will help you get started with your Openspot and have it up and running in no time.
1. Connect your Openspot to a power source using the provided power adapter. Make sure it is properly plugged in and turned on.
2. Connect your Openspot to your internet router using an Ethernet cable. This will allow your Openspot to connect to the internet and access the necessary resources.
3. Once your Openspot is connected to the power source and the internet, you can access its web interface by opening a web browser on your computer and entering the IP address of your Openspot. The default IP address is usually 192.168.1.100, but you can check the user manual or the device itself for the correct IP address.
4. After entering the IP address, you will be prompted to enter the username and password for your Openspot. The default username is usually “admin” and the default password is usually “openspot”. If you have changed the username and password, enter the new credentials.
6. To configure the Wi-Fi network, go to the “Network” tab and select “Wi-Fi”. Here, you can scan for available Wi-Fi networks and enter the password for your desired network. Once connected, your Openspot will be able to access the internet wirelessly.
8. After configuring the necessary settings, make sure to save your changes by clicking on the “Save” or “Apply” button. Your Openspot will then apply the new settings and restart if necessary.
9. Once your Openspot has restarted, it should be fully configured and ready to use. You can now start using your Openspot to communicate with other users on the DMR network.
By following these simple steps, you can quickly and easily set up and configure your SharkRF Openspot. Whether you are a beginner or an experienced user, the Openspot offers a wide range of features and capabilities that will enhance your DMR experience.
Setting Up and Configuring Openspot
Setting up and configuring your SharkRF Openspot is a straightforward process that can be completed in just a few simple steps. Follow the guide below to get started:
Step 1: Connect Openspot to Power and Network
First, connect your Openspot device to a power source using the provided power adapter. Then, connect one end of an Ethernet cable to the Ethernet port on the back of the Openspot, and the other end to your router or network switch.
Step 2: Access the Openspot Web Interface
Once your Openspot is powered on and connected to the network, open a web browser on your computer or mobile device and enter the IP address of your Openspot in the address bar. The default IP address is usually 192.168.0.100, but you can check the user manual or use a network scanning tool to find the IP address of your device.
Step 3: Log in to the Openspot Web Interface
After entering the IP address in the web browser, you will be prompted to log in to the Openspot web interface. The default username is “admin” and the default password is “openspot”. If you have changed the default login credentials, enter the appropriate username and password.
Step 4: Configure Openspot Settings
Once logged in, you will have access to the Openspot web interface dashboard. From here, you can configure various settings such as Wi-Fi, DMR, D-Star, Fusion, and more. Take some time to explore the different options and customize the settings according to your preferences.
Step 5: Save and Apply Changes
After making any necessary changes to the Openspot settings, be sure to save and apply the changes. This will ensure that the new settings take effect and are applied to your Openspot device.
That’s it! You have successfully set up and configured your SharkRF Openspot. Now you can start using it to connect to different digital radio networks and communicate with other users around the world.
Advanced Features and Tips for Using Openspot

Once you have set up and configured your SharkRF Openspot, there are several advanced features and tips that can enhance your experience and make the most out of this device.
- Remote Control: The Openspot allows for remote control through its web interface. This means you can access and control your Openspot from anywhere with an internet connection. This feature is especially useful if you need to make changes or adjustments while you are away from your device.
- DMR Gateway: The Openspot can act as a DMR gateway, allowing you to connect different DMR networks together. This feature enables seamless communication between different networks and expands the reach of your Openspot.
- Hotspot Mode: The Openspot can be used in hotspot mode, which allows you to connect multiple devices to it simultaneously. This is particularly useful if you have multiple radios or devices that you want to connect to the Openspot at the same time.
- GPS Support: If your Openspot has GPS support, you can enable this feature to display your location information on compatible radios. This can be helpful for tracking and locating other users or for providing accurate location information during emergency situations.
- Remote Firmware Updates: SharkRF regularly releases firmware updates for the Openspot, which can bring new features, bug fixes, and improvements. You can easily update the firmware of your Openspot remotely through the web interface, ensuring that you always have the latest version.
By utilizing these advanced features and following these tips, you can maximize the functionality of your SharkRF Openspot and enjoy a seamless and enhanced communication experience.

Over the years, I have amassed a wealth of experience and knowledge, which I eagerly share with fellow radio aficionados. Through my writing and active participation in the amateur radio community, I strive to inspire others and provide valuable insights into this fascinating hobby. Engaging in various radio activities, I continue to learn and grow, constantly amazed by the endless possibilities that radio communication offers.