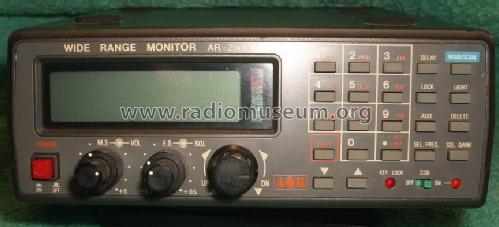

Welcome to the ultimate guide to the AOR AR 2500! If you’re a radio enthusiast or a professional in the field, you’ve come to the right place. The AOR AR 2500 is a top-of-the-line receiver that offers exceptional performance and versatility. Whether you’re interested in amateur radio, public safety communications, or monitoring air traffic, this guide will provide you with all the information you need to make the most of your AR 2500.
With its wide frequency coverage and advanced features, the AOR AR 2500 is a must-have for any serious radio enthusiast. It covers a frequency range from 100 kHz to 3 GHz, allowing you to listen to a wide variety of signals. Whether you’re interested in shortwave broadcasts, ham radio, or even satellite communications, the AR 2500 has you covered.
One of the standout features of the AOR AR 2500 is its advanced scanning capabilities. It offers both conventional and trunked scanning, allowing you to easily monitor multiple frequencies and systems. The AR 2500 also supports alpha tagging, so you can easily label and organize your favorite channels for quick access.
Another great feature of the AR 2500 is its built-in spectrum analyzer. This powerful tool allows you to visualize the RF spectrum and identify signals of interest. Whether you’re trying to track down interference or simply curious about the signals in your area, the spectrum analyzer is an invaluable tool.
In addition to its impressive features, the AOR AR 2500 is also built to last. It features a rugged construction and high-quality components, ensuring years of reliable performance. Whether you’re using it in the field or in your home, you can count on the AR 2500 to deliver exceptional results.
Features and Specifications of the AOR AR 2500
The AOR AR 2500 is a high-performance scanner that offers a wide range of features and specifications. Whether you are a professional or a hobbyist, this scanner is sure to meet your needs. Here are some of the key features and specifications of the AOR AR 2500:
Frequency Range
The AOR AR 2500 covers a frequency range of 100 kHz to 2.3 GHz, allowing you to listen to a wide variety of signals. Whether you are interested in listening to police scanners, ham radio transmissions, or air traffic control, this scanner has you covered.
Memory Channels
The AOR AR 2500 has a total of 1000 memory channels, allowing you to store all of your favorite frequencies for easy access. You can organize your channels into groups and easily navigate through them using the scanner’s intuitive interface.
Scan Modes
This scanner offers several scan modes, including VFO, memory, and program scan. The VFO scan mode allows you to manually tune to different frequencies, while the memory scan mode allows you to scan through your stored channels. The program scan mode allows you to scan through pre-programmed search ranges.
Signal Strength Meter
The AOR AR 2500 features a signal strength meter that allows you to easily determine the strength of the signal you are receiving. This can be especially useful when trying to locate weak or distant signals.
Search Function
In addition to scanning through pre-programmed frequencies, the AOR AR 2500 also has a search function that allows you to search for new frequencies. This can be useful for finding new and interesting signals to listen to.
Backlit Display
The scanner’s backlit display makes it easy to read the frequency and other information, even in low light conditions. This is especially useful if you plan on using the scanner at night or in dimly lit environments.
PC Control
The AOR AR 2500 can be connected to a computer via a USB cable, allowing you to control the scanner using PC software. This can make it easier to program and manage your channels, as well as update the scanner’s firmware.
Power Options
The scanner can be powered using either an AC adapter or batteries, giving you the flexibility to use it at home or on the go. The scanner also has a built-in battery charger, so you can easily recharge your batteries when needed.
| Features | Specifications |
|---|---|
| Frequency Range | |
| Memory Channels | 1000 |
| Scan Modes | VFO, memory, program |
| Signal Strength Meter | Yes |
| Search Function | Yes |
| Backlit Display | Yes |
| PC Control | Yes |
| Power Options | AC adapter, batteries |
Overall, the AOR AR 2500 is a versatile and feature-packed scanner that is perfect for both beginners and experienced users. With its wide frequency range, ample memory channels, and various scan modes, you can easily customize your scanning experience to suit your preferences. Whether you are interested in monitoring emergency services, amateur radio, or aviation communications, the AOR AR 2500 has you covered.
How to Set Up the AOR AR 2500
Setting up the AOR AR 2500 scanner is a straightforward process that can be completed in just a few simple steps. Follow the instructions below to get your scanner up and running:
Step 1: Unpack the Scanner
Start by unpacking the AOR AR 2500 scanner from its box. Make sure to remove all packaging materials and check that all the necessary components are included.
Step 2: Connect the Antenna
Next, connect the antenna to the back of the scanner. Ensure that it is securely attached to the antenna port to ensure optimal reception.
Step 3: Power On the Scanner
Plug in the power cord of the AOR AR 2500 scanner and turn it on. The scanner will boot up and display the main menu on the screen.
Step 4: Set the Date and Time
Use the arrow keys on the scanner to navigate to the “Settings” menu. From there, find the option to set the date and time. Use the numeric keypad to enter the correct date and time information.
Step 5: Select the Language
In the “Settings” menu, locate the language option and select your preferred language from the available options. This will ensure that all menu and display text is shown in your desired language.
Step 6: Configure the Scanner Settings
Step 7: Program Frequencies
Now that the basic setup is complete, you can start programming frequencies into the scanner. Refer to the user manual for detailed instructions on how to program frequencies manually or using software.
Step 8: Test the Scanner
Once you have programmed some frequencies, it’s time to test the scanner. Tune into a known frequency and listen for any transmissions. Adjust the settings as needed to optimize the reception.
By following these steps, you can easily set up the AOR AR 2500 scanner and start enjoying its scanning capabilities. Remember to refer to the user manual for more detailed instructions and troubleshooting tips.
Programming the AOR AR 2500
Programming the AOR AR 2500 scanner is a straightforward process that allows you to customize the device to your specific needs. Whether you want to monitor a specific frequency or set up a scanning list, the AOR AR 2500 provides you with the flexibility to do so.
Step 1: Accessing the Programming Menu
To begin programming the AOR AR 2500, you need to access the programming menu. Press the “Menu” button on the scanner, and then use the arrow keys to navigate to the “Programming” option. Press the “Enter” button to enter the programming menu.
Step 2: Selecting a Channel
Once you are in the programming menu, you can select the channel you want to program. Use the arrow keys to navigate through the available channels and highlight the desired one. Press the “Enter” button to select the channel.
Step 3: Entering the Frequency
After selecting the channel, you can enter the frequency you want to program. Use the numeric keypad on the scanner to input the frequency, including the decimal point. Press the “Enter” button to confirm the frequency.
Step 4: Setting the Channel Name
Next, you can set a name for the programmed channel. Use the alphanumeric keypad on the scanner to enter the desired name. Press the “Enter” button to confirm the channel name.
Step 5: Saving the Programmed Channel
Once you have entered the frequency and set the channel name, you need to save the programmed channel. Press the “Menu” button to exit the programming menu. The programmed channel will now be saved and accessible for scanning.
Step 6: Editing or Deleting Programmed Channels
If you need to edit or delete a programmed channel, you can access the programming menu again and navigate to the desired channel. Press the “Enter” button to select the channel, and then make the necessary changes or choose the delete option.
| Button | Action |
|---|---|
| Menu | Access the programming menu |
| Arrow Keys | Navigate through options and channels |
| Enter | Select options and channels, confirm input |
By following these steps, you can easily program the AOR AR 2500 scanner and customize it to suit your scanning preferences. Whether you are a beginner or an experienced user, the AOR AR 2500 offers a user-friendly programming interface that allows you to get the most out of your scanner.
Using the AOR AR 2500 for Scanning
When using the AOR AR 2500 for scanning, there are a few key tips and tricks that can help you get the most out of your device. Here are some suggestions:
| 1. Familiarize Yourself with the Controls | Before you start scanning, take the time to familiarize yourself with the controls and buttons on the AR 2500. This will make it easier for you to navigate through the menus and access the features you need. |
| 2. Set Up Your Frequencies | The AR 2500 allows you to program and store frequencies for easy access. Take the time to set up your favorite frequencies, whether it’s for emergency services, weather channels, or amateur radio. This will save you time and effort when you want to scan specific frequencies. |
| 3. Use the Scan Modes | The AR 2500 offers different scan modes, such as priority scan, search scan, and memory scan. Experiment with these modes to find the one that works best for your scanning needs. For example, if you want to prioritize certain frequencies, use the priority scan mode. |
| 4. Customize the Display | The AR 2500 allows you to customize the display to show the information that is most important to you. You can choose to display the frequency, channel name, signal strength, and other details. Take advantage of this feature to make your scanning experience more efficient. |
| 5. Utilize the Search Function | |
| 6. Connect External Antennas | If you want to improve the scanning performance of the AR 2500, consider connecting external antennas. This can help you pick up weaker signals and expand your scanning range. There are various types of antennas available, so choose one that suits your needs and budget. |
By following these tips and tricks, you can enhance your scanning experience with the AOR AR 2500. Remember to always stay within the legal limits and respect the privacy of others when using your scanner.
Tips and Tricks for Getting the Most out of the AOR AR 2500
1. Familiarize Yourself with the Manual
2. Customize Your Settings
One of the great things about the AOR AR 2500 is its ability to be customized to suit your specific scanning needs. Take advantage of this by exploring the various settings and options available. From adjusting the squelch level to setting up scan lists, customizing your settings will allow you to tailor the scanner to your preferences and optimize its performance.
Pro Tip: Experiment with different settings to find the ones that work best for you. Don’t be afraid to tweak and adjust until you achieve the desired results.
3. Utilize the Memory Banks
The AOR AR 2500 features multiple memory banks, which can be used to store your favorite frequencies or organize them by category. Take advantage of these memory banks by assigning different frequencies to each bank. This will make it easier for you to access and scan specific frequencies or groups of frequencies without having to manually enter them each time.
4. Take Advantage of the Search Function
The AOR AR 2500 has a powerful search function that allows you to scan for active frequencies within a specified range. This can be particularly useful if you are in an area where you are unsure of the frequencies being used. Use the search function to quickly identify and store new frequencies, expanding your scanning capabilities.
5. Regularly Update Your Frequency Database
6. Connect to a Computer
If you want to take your scanning experience to the next level, consider connecting your AOR AR 2500 to a computer. This will allow you to use software programs that can enhance your scanning capabilities, such as frequency management software or logging programs. Connecting to a computer opens up a whole new world of possibilities for your scanner.
Note: Make sure to follow the manufacturer’s instructions for connecting your scanner to a computer and using any associated software.
By following these tips and tricks, you will be able to maximize your scanning experience with the AOR AR 2500. Whether you are a hobbyist, a professional, or simply someone who enjoys staying informed, this scanner will provide you with the tools you need to stay connected and informed.
Troubleshooting Common Issues with the AOR AR 2500
| Issue | Possible Solution |
|---|---|
| No Power | Check if the power cable is properly connected to the scanner and the power source. Ensure that the power source is functioning correctly. If the issue persists, try using a different power cable or contact customer support for further assistance. |
| Poor Reception | Make sure that the antenna is properly connected to the scanner. Check if the antenna is positioned correctly and is not obstructed by any objects. Adjust the antenna for optimal reception. If the issue continues, try using a different antenna or consider relocating the scanner to a different area with better signal reception. |
| Programming Errors | If you are experiencing issues with programming the scanner, double-check the entered frequencies and settings. Ensure that you are using the correct programming software and following the instructions accurately. If the problem persists, consult the user manual or seek assistance from online forums or customer support. |
| Scanner Freezing or Crashing | If the scanner freezes or crashes frequently, try performing a factory reset. This will restore the scanner to its default settings and may resolve any software-related issues. Ensure that you have the latest firmware installed on the scanner. If the problem persists, contact customer support for further assistance. |
| Interference or Noise | If you are experiencing interference or noise during scanning, try adjusting the squelch settings. The squelch helps filter out unwanted signals and reduce background noise. Experiment with different squelch levels to find the optimal setting for your environment. Additionally, ensure that the scanner is not placed near any electronic devices that may cause interference. |
By following these troubleshooting tips, you should be able to resolve common issues that may arise with the AOR AR 2500 scanner. If you encounter any persistent or complex problems, it is recommended to seek assistance from the manufacturer’s customer support or consult online communities for further guidance.
Comparing the AOR AR 2500 to Other Scanners
1. Frequency Range: The AOR AR 2500 offers an impressive frequency range, covering from 100 kHz to 3 GHz. This wide range allows you to listen to a variety of signals, including amateur radio, public safety, aviation, and more.
2. Sensitivity: The AOR AR 2500 is known for its exceptional sensitivity, allowing you to pick up weak signals with ease. This is especially useful in areas with low signal strength or when trying to listen to distant transmissions.
3. Multi-Mode Reception: Unlike some scanners that only support a single mode, the AOR AR 2500 can receive signals in multiple modes, including AM, FM, NFM, WFM, and more. This versatility makes it suitable for a wide range of applications.
4. Memory Capacity: With a generous memory capacity, the AOR AR 2500 allows you to store a large number of frequencies and channels. This is particularly useful if you need to monitor multiple frequencies or if you frequently switch between different channels.
5. Build Quality: The AOR AR 2500 is built to last, with a sturdy construction that can withstand the rigors of regular use. Its durable design ensures that it will continue to perform reliably even in demanding environments.
6. User-Friendly Interface: The AOR AR 2500 features an intuitive interface that is easy to navigate, making it simple to program and use. Whether you are a beginner or an experienced user, you will appreciate the user-friendly design of this scanner.
7. Price: While the AOR AR 2500 may be priced higher than some other scanners on the market, its advanced features and exceptional performance make it worth the investment. If you are serious about scanning, the AOR AR 2500 is a scanner that you can rely on.

Over the years, I have amassed a wealth of experience and knowledge, which I eagerly share with fellow radio aficionados. Through my writing and active participation in the amateur radio community, I strive to inspire others and provide valuable insights into this fascinating hobby. Engaging in various radio activities, I continue to learn and grow, constantly amazed by the endless possibilities that radio communication offers.